2013년 1월 23일 수요일

MSRDS Tutorial - Day #2


If you click below website,

http://helloappskr.azurewebsites.net/Download/


You will see below webpage.


Download the above programs from STEP 1 to STEP 3 in order.
 
Then, you will find below services" if you search "robobuilder" keyword in "Services" section
after you run "Micorsoft Visual Program Language 4".


In MSRDS4,

  For sensor part, you can use "sound / touch / IR" sensor" of RQ-HUNO.

  "AccelerationSensorModule" service can be used in 5720T-A03 model.

  For "SmartActuatorConfig" service, you can control in each RQ-HUNO servo module
    position separately.


1) RoboBuilder Brick

   => Connect to actual hardware robot device.
   => Play Music and Motion file

2) RoboBuilder SmartActuatorModule

  => Read / Control position value of each actuator of SAM or RQ-HUNO.

3) RoboBuilder SmartActuatorConfig

  => Set up  baudrate, speed, PID gain value of each actuator.

4) RoboBuilder MotionPlayModule

  => Play pre-Programmed in Robot

5) RoboBuilder TouchIrSensorModule

  => Read and config "Touch and IR sensor" value

6) RoboBuilder SoundSensorModule

  => Read and config "Sound sensor" value.


Each Brick connects between function service and robot hardware.

Relationship between "Brick service" and "Other service" is as follows.


2013년 1월 18일 금요일

Android App MotionBuilder fuction


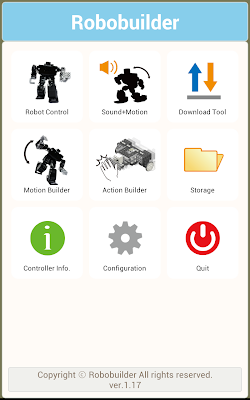
Just released new version (v1.17) of Android App. today!


You can download RoboBuilder Android App. from Google PlayStore

Search keyword is "rq robot" in Play Store.

Updated function is mainly "MotionBuider" in App.


Now you can really do the Motion programming in your Smart Phone, No needs PC.


1) Power On "RQ-HUNO".


2) Run "RoboBuilder Tool" app in your phone.


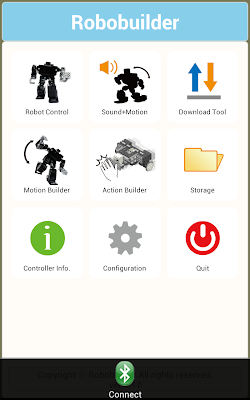
3) Press "menu" in your phone and connect "RQ-HUNO" by Bluetooth.


4) You can touch "Scan" and find your "RQ-BT" as below and "Accept" it.


5) Then, you can see "Connect to "RQ-BT (5ff00f)"".
    Your RQ-BT unique code (5ff00f) is different. 


6) Touch "Motion Builder", and you will see the Motion Builder.

    Press "menu" and touch "New". 


7) Input any your prefer Motion File Name. (for example. "abc".)
   Then you see the "Motion Config" window.
   Robot Platform is selected as "RQ-HUNO" automatically. 


   Now you can touch "New" for creating "Scene" for RQ-HUNO.


8) Touch ID section "10". and you can scroll the "ID 10"  to the right.

   As you scroll to the right, RQ-HUNO "ID10" servo module moves as below.


9) Touch ID section "11". and you can scroll the "ID 11"  to the right.

   As you scroll to the right, RQ-HUNO "ID11" servo module moves as below.


10) Touch "Confirm" and now "Scene 0" is added.


11) Now, we add "Basic Posture" in Scene 1.
     Touch "New" and then, touch "Dest." a bit longer than usual.

     You will see the ID10 and ID11 value has been changed for Basic Posture.


12) Now, we can test the motion that we just made.

 Touch "Scene 0" section a bit longer, then you can see the various menu.

 Select "Block Begin". 

 Touch "Scene 1" section a bit longer, then select "Block End".


 Try to touch "Motion Test". then you can see the result.


13)  Let's download my Motion to RQ-HUNO. 
       Touch "Download Tool".


14) Touch "Add", and choose Motion "abc.rbm". 

 Then, touch "Transfer File" to download your RQ-HUNO.


After you can see "Complete" message.

Now you can run your motion (Button 1) in "Robot Control" section.


Tip 1)

Try to add more "Scenes" and adjust "Frame" and "Playtime" 
to make more realistic RQ-HUNO motions.


Tip 2)

You can do "Catch-and-Play" function.

Example
If you want to catch "ID 10 value",
then touch "ID 10 Dest. Value" a bit longer time.
Then value will be shown in Blue.


Now, try to move your "ID 10 servo" of RQ-HUNO 

              after "ID 10 Dest. Value" is changed  into Blue.


You will see that "ID 10 Dest. Value" is changed in real-time.


RQ-HUNO with ARDUINO - Day #1


RQ-HUNO is mainly consist of 16 pcs of  SAM-3 robot module.

SAM is stand for "Smart Actuator Module",  and  3 means 3kg.cm torque power.


Let's see how to control SAM-3 with Arduino Board today!


Prepare below.

- ARDUINO UNO R3 Board   1 pcs


- USB Cable                             1 pcs


- SAM-3                                   1 pcs


- 4 pin Cable                             1 pcs


and your PC + Arduino software environment.


For the detailed Arduino software configuration, visit to http://www.arduino.cc/.


For the example source of the SAM-3 control,


Full source is as below.

/*
Blink & SAM Control
Turns on an LED and changes a SAM position on for one second, then off for one second, repeatedly.

This example code is in the public domain.
*/

// Pin 13 has an LED connected on most Arduino boards.
// give it a name:
int led = 13;
// for SAM control
int id; // SAM id
int torq; // torque level(0:max, 4:min)
int checksum; // protocol checksum
int tmp1, tmp2; // temporary byte
// the setup routine runs once when you press reset:
void setup() {
// initialize the digital pin as an output.
pinMode(led, OUTPUT);
// start serial port at 115200 bps:
Serial.begin(115200);
while (!Serial) {
; // wait for serial port to connect. Needed for Leonardo only
}
id = 0;
torq = 2;
}
// the loop routine runs over and over again forever:
void loop() {
digitalWrite(led, HIGH); // turn the LED on (HIGH is the voltage level)
tmp1 = (torq << 5) | id;
tmp2 = 20; // position1
checksum = (tmp1 ^ tmp2) & 0x7f;
Serial.write(0xff);
Serial.write(tmp1);
Serial.write(tmp2);
Serial.write(checksum);
delay(1000); // wait for a second
digitalWrite(led, LOW); // turn the LED off by making the voltage LOW
tmp1 = (torq << 5) | id;
tmp2 = 120; // position2
checksum = (tmp1 ^ tmp2) & 0x7f;
Serial.write(0xff);
Serial.write(tmp1);
Serial.write(tmp2);
Serial.write(checksum);
delay(1000); // wait for a second
}


Then, you need to connect "hardware part" properly.

Hardware Connection


For the detailed hardware part connection,

Make the cable as shown in the right.


SAM-3 pin layout is as below.
 
For the Rx/Tx connection,
 
    -  connect Rx of SAM-3  with Tx of Arduino board.
    -  connect Tx of SAM-3  with Rx of Arduino board.


After proper connection of all hardware part, then connect USB to PC.

And Compile the source and Upload to Arduino board.


Then, you will see SAM-3 moves from 20 degree to 120 degree continuously


2013년 1월 12일 토요일

JingleBell Motion


JingleBell Motion : Download

Please click "Download" link and you can download "JingleBell.zip".

Unzip this file, then, you will see
- JingleBell.rbm
- JingleBell.mp3


Tip 1)
In order to  match the synchro between Motion and Music,
           you may play Motion after Music is played about 5 seconds later.


Tip 2)
You can use the Android smartphone fuction in order to play Motion and Music as below.

For more information about "Android OS App function", go to "User Manual" section in the left.
Then you can find "Android OS App User Manual".


2013년 1월 10일 목요일

C Programming Tutorial - preparation


In this section, you learn "C Programming" with RQ-HUNO.


Software

 1) IAR Embedded Workbench for ARM (version 5.50 or above)
     => C compiler for RQ robot series C programming
     => Download here

          It is recommended to download “Size-limited license – 32K” version.


 2) USB-UART download cable driver (for XP, Win 7)
   => Driver for USB-UART download cable.
   => Download here


 3) HyperTerminal
   => Terminal communication program (included in Windows XP basically)
   => For Windows 7 user, please download in here  for free trial version.


 4) RQC Firmware Upload Tool
   =>  Firmware (Binary file/”RQ.bin”) for RQ robot to send RQ smart controller
   => Download here


 5) RQC C library
   => C library source for RQ robot C programming
   => Download here


Hardware


MSRDS Tutorial - Day #1


In this post, you learn what "MSRDS" is simply, and get a concept.


MSRDS (Microsoft Robotics Developer Studio) is provide creative and logical robot programming platform , developed by Microsoft.

For more  information of MSRDS, please visit

1) http://www.microsoft.com/robotics/

2) http://www.helloapps.net


All RoboBuilder series (RQ-KIT/RQ-HUNO/CREATOR KIT/SAM/RQ-TITAN) are compatible with MSRDS platform very well.


In this section, we will learn MSRDS - VPL programming by using "RQ-HUNO" step by step.


For own MSRDS (simulation and own software) programming tutorial, you can get  quite nice education materials from http://www.helloapps.net  website.


MotionBuilder Tutorial - Day #2


In this post, we learn "Terms" that used in MotionBuilder.


1. What are the "Project file / Motion file / Scene / Frame / Transition Time"?


1) Project file(*.prj)
: A project file contains the information such as the robot’s type and more. It is used to manage multiple motion files of a robot efficiently. Therefore, one project file includes one or more motion files.   You can consider that Project file as a "file folder".

 
2) Motion file(*.rbm)
: A motion file contains the complete data to execute its movement. One motion file consists of multiple scenes.


3) Scene
: A scene is a smaller motion unit that constitutes a complete motion file. A scene consists of start position and destination position. Except the first scene, the start position of a scene is the destination position of its previous scene. When a scene is executed, the frame data is generated automatically according to the predefiend number of frames and delivered to each actuator modules.


4) Frame
: A frame is the smallest motion unit that constitutes a scene. Each frame can be considered as the still image that is actually sent to robot actuators. The more frames you defien, the smoother the motion becomes. One scene can have from 1 up to 100 frames.


5) Transition Time
: Transition time is the time duration that is taken to execute a scene. Transition time is closely related with the number of frames. It can have value from 20msec up to 10000msec.
The minimum transition time that can be allocated for a frame is 20msec.
e.g)  If scene A has 10 frames, the transition time can be selected from 200 up to 10000.

MotionBuilder Tutorial - Day #1


In this post, we learn what is MotionBuilder for, and preparations. 


1. MotionBuilder Layout


2. MotionBuilder Main Purpose

 - Create your own motions whatever you think

 - Modify other users motions whatever you think


3. This Tutorial is for someone who

 - agree that RoboBuilder is not just an expensive toy

 - want to modify others’ motions and make their own motions

 - want to create a motion file for themselves

 - want to share their own motion files with many others

 - want to learn advanced features of MotionBuilder


4. Things to prepare

 - RQ-HUNO

 - PC (Windows OS based Desktop or Laptop)

 - PC Motion Download Cable

 - RQ-HUNO Power Adapter


2013년 1월 8일 화요일

Using RQ-HUNO


Click images to see bigger.


Android App User Manual


Android App user manual : Download


RQ-HUNO can be controlled by Android OS based device.

2013년 1월 5일 토요일

Gangnam Style Motion


RQ-HUNO Motions #4 : Download


NOTE)

You have to change the RQ-HUNO arm from "Normal Walking Type"  to 
"Dancing Typeas below.


Motions #3


RQ-HUNO Motions #3 : Download


2013년 1월 2일 수요일

RQ-TITAN Specification


 More detailed information of RQ-TITAN specification : Download


RQ-TITAN video demonstration

RQ-TITAN Brochures


RQ-HUNO performance

RQ-HUNO Softwares


RQ-HUNO Softwares


 1) RoboBuilder Software Pack : Download

      - MotionBuilder
      - ActionBuilder
      - Download Tool
      - Diagnostic Tool
      - Zeropoint Tool


 2) RoboBuilder Android OS based application : Download


 3) USB-UART Download Cable Driver : Download


 4) RQC Firmware Upgrade Tool : Download


 5) MSRDS (Microsoft Robotics Developer Studio : Download